Manual workflows were introduced in AutomateWoo 5.0. Workflows are the foundation of AutomateWoo, providing the framework for building automated tasks.
Automatic workflows run when a trigger fires which typically happens when a specific event occurs on your store. Manual workflows have no trigger and are instead initiated by the store manager.
What can I do with manual workflows?
↑ Back to topCurrently, manual workflow functionality is available for orders and subscriptions (if you have the Woo Subscriptions plugin active). In future versions, we hope to expand this to customers and carts.
Here are some example use cases:
Send a one-off bulk email to first time customers who placed an order in June.
Send a one-off email to customers with a subscription that ended in the last 30 days and contained a specific product.
Notify customers waiting on order fulfillment that there will be a delay in shipping a specific product.
Bulk update subscription prices and notify customers of the change via email.
Some other manual workflow ideas:
↑ Back to top- Add a tag in MailChimp to all customers who purchased from a specified category in the past year
- Send a one-off email to customers with a subscription renewing in the next X days
- Send a product recall notification
- Recalculate taxes for all subscriptions in a certain region
- Send a one-off email to customers who purchased a specific product with a suggestion to buy a new similar product
How to create a manual workflow
↑ Back to topWhen creating a workflow you now have the ability to choose whether the workflow type is automatic (i.e. how all workflows work before version 5.0) or manual.
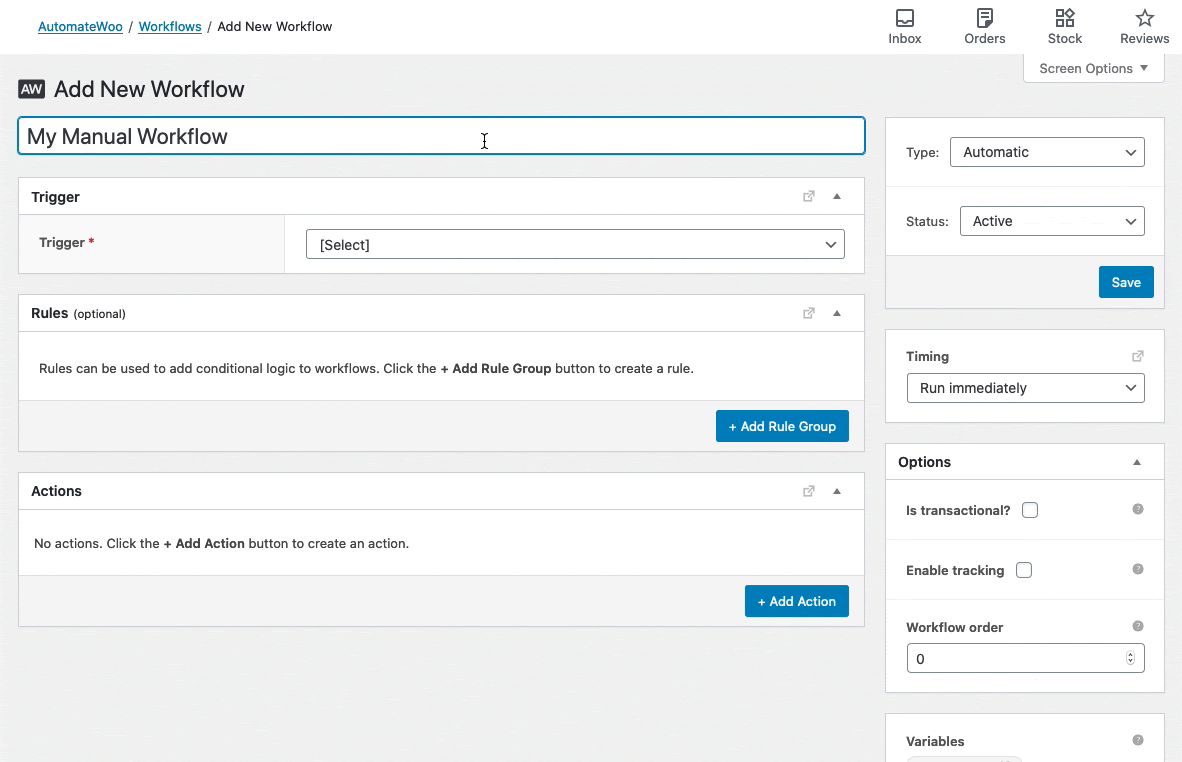
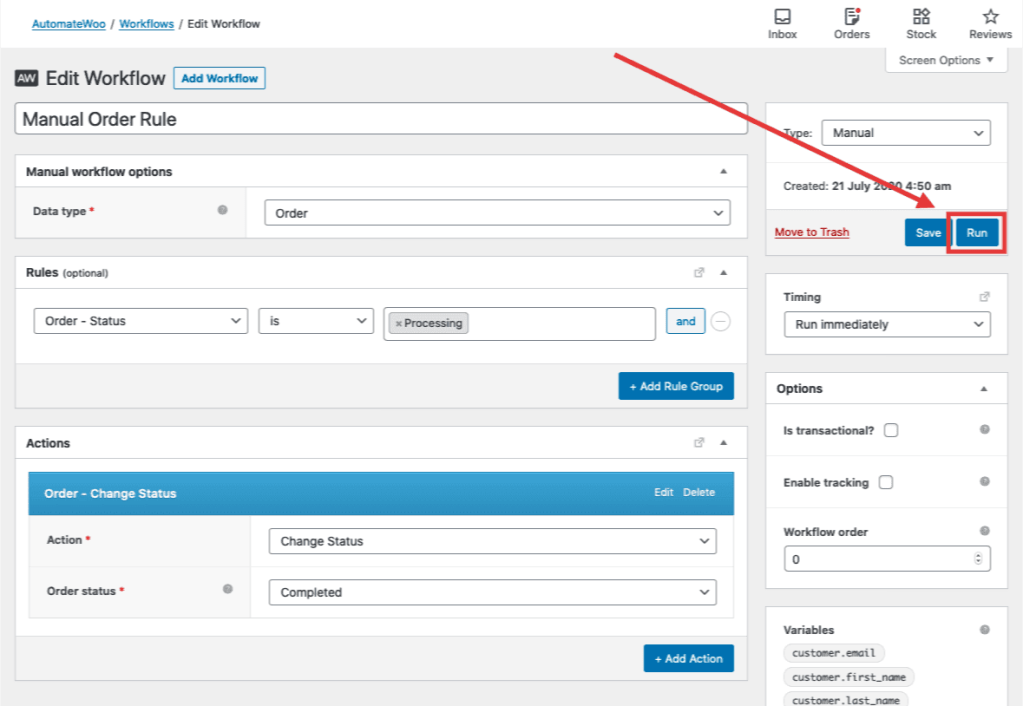
Selecting “Manual” means you’ll have an option to select a data type instead of a trigger like with automatic workflows. The data type determines which data the workflow can run for and which rules, actions and variables you can use in the workflow.
How to run a manual workflow
↑ Back to topOnce a manual workflow has been saved you can begin running it by clicking the Run button.
You’ll be directed to a new step by step process which guides you through the process of running your manual workflow.
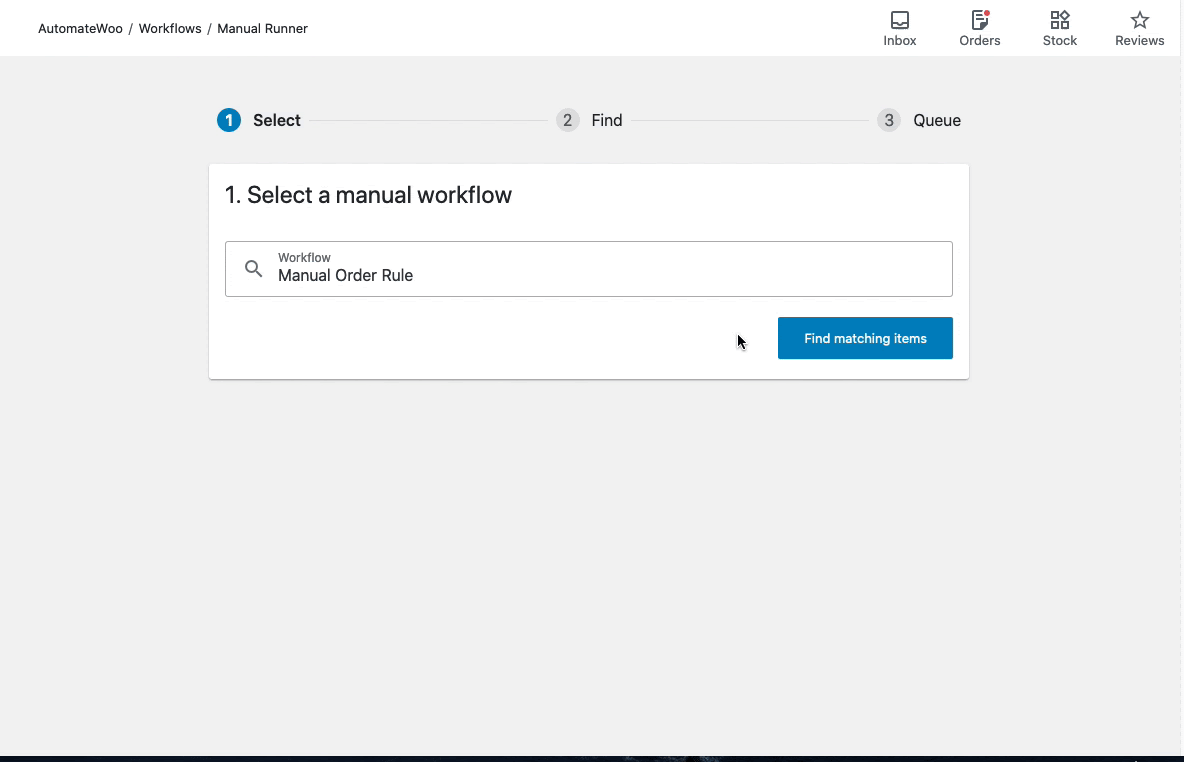
There are 3 steps:
- Select a manual workflow – here you are given an opportunity to confirm you have the correct manual workflow selected.
- Find matching items – Clicking the “Find matching items” button will find all items (orders or subscriptions) that match the rules you added to the workflow. This lets you preview exactly which items the workflow will run for.
- Add to workflow queue – Clicking the “Run workflow for X items” button will add the items to the workflow queue.
Notes:
- The existing manual trigger tools that were found in AutomateWoo > Tools have been removed and replaced by the manual workflows feature.
- If your workflow finds a large number of matching items the workflow runner will prompt you to consider updating your workflow rules to help refine your results.
- Adding items to the workflow queue doesn’t mean they will run instantly – there will be a slight delay as the queue is processed.
- Manual workflows require WooCommerce Admin (wc-admin) to be enabled. If you have disabled it using a plugin or custom filter, the manual workflows interface will fail to load.