There are a few different ways you can customize how your AutomateWoo emails look. You might want your emails to match the design of your store, or you might want them to look simple and clean.
Solutions include using plugins that let you modify the design with a few clicks. Or, if you’re comfortable with code, you could create your own custom email templates.
This doc covers all the different options available for customizing your emails:
Using the WooCommerce default email template
↑ Back to topBy default, AutomateWoo emails are styled with the same template as your WooCommerce transactional emails. This means, if you have already customized the design of your WooCommerce emails, AutomateWoo will automatically inherit that template.
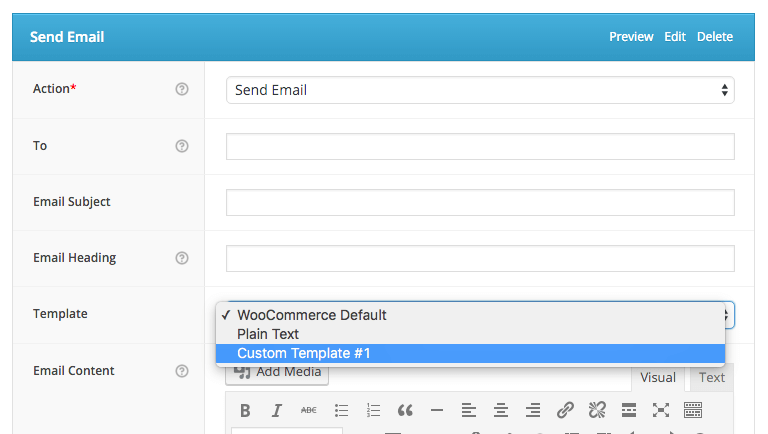
To create an email with this template, use the Send Email action and ensure the Template field set to WooCommerce Default.

Customizing the WooCommerce email template
↑ Back to topThere are two main ways to change the design of your WooCommerce email template. Firstly, you can use an email customizer plugin to modify the appearance of your emails without code. There are a number of plugins that do this, and here are a few we recommend:
Alternatively, you can use custom code to modify the email designs. This may be necessary if you’d like to make more extensive changes to the layout. Thanks to the WooCommerce template system, it’s possible to override the default templates in your theme and make the adjustments you want. However, this will require the skills of a developer.
Using no template
↑ Back to topAutomateWoo emails can be made to appear as normal emails by using no template or styles. This can make your emails feel more personal because they appear to have been sent by a real person rather than via an automated system.
To create an email with no template, use the Send Email action and set the Template field to None.
Please note that using no template is different from sending a plain text email. This is because plain text emails don’t allow the use of any HTML elements such as links, buttons, images, product tables or bold text. Choosing ‘no template’ does allow the use of HTML elements while not using an HTML template.
Sending plain text emails
↑ Back to topYou can send a completely plain text email by using the Send Email – Plain Text action. Because plain text emails don’t contain HTML, no styling or text formatting options are available. Open tracking and click tracking is also not available.
Please note, workflow variables that output HTML such as {{ order.items }} or {{ shop.product }} may not display correctly due to having HTML removed.
Using the raw HTML action
↑ Back to topThe Send Email – Raw HTML action is intended for advanced use only and allows adding all the HTML (including CSS) for the email in the action itself. This is different from the standard Send Email action, which inserts the email’s content into a template. The Raw HTML is useful if you are designing your emails in a separate tool and exporting the HTML to AutomateWoo.
In most cases, we don’t recommend using this method due to the difficulties in manually creating and inserting raw HTML and CSS in workflows. Often creating a custom AutomateWoo email template is a better solution.
Creating a custom template
↑ Back to topIt’s possible to create additional custom email templates for use in the Send Email action. This means you can use different email templates for different workflows.
The first step in creating a custom template is to register it with the automatewoo_email_templates filter in your functions.php file. The following code snippet shows how to do this:
Once this is done, you should see your new template appear in Send Email action’s Template select box.
The default location for custom template files is in your site’s active theme. For example the path should look like: /%my theme%/automatewoo/custom-email-templates/%my unique template slug%/. As of AutomateWoo version 4.8, it’s possible to set a custom path for your email template. This is shown in the code snippet above.
There are three files that make up the WooCommerce email template and AutomateWoo email template follow the same format:
- email-footer.php
- email-header.php
- email-styles.php
A good place to start your custom template is to copy the template files found in /wp-content/plugins/woocommerce/templates/emails/ to your new custom template directory. After this, you can freely modify these files to make your new template different without affecting the default WooCommerce template.
Customizing email styles with a filter
↑ Back to topNote: We are unable to provide support for customizations under our Support Policy. If you need to further customize a snippet, or extend its functionality, we highly recommend Codeable, or a Certified WooExpert.
An alternative method to overriding WooCommerce email template files in your theme, is to use the woocommerce_email_styles filter. This filter allows developers to modify the email styles used by both WooCommerce and AutomateWoo templates within a plugin or theme. This method is sometimes preferable to the template override method.
The following code snippet is an example usage of the woocommerce_email_styles filter:
<?php

add_filter( 'woocommerce_email_styles', 'my_filter_woocommerce_email_styles' );

/**
 * Filter email styles for WooCommerce and AutomateWoo.
 *
 * @param string $css
 *
 * @return string
 */
function my_filter_woocommerce_email_styles( $css ) {
	$css .= "#template_header { background-color: #7532e4; } ";

	return $css;
}